Kitty and Bean
  • Blog
  • Store

Mommy and Me Hats

2/19/2015

0 Comments


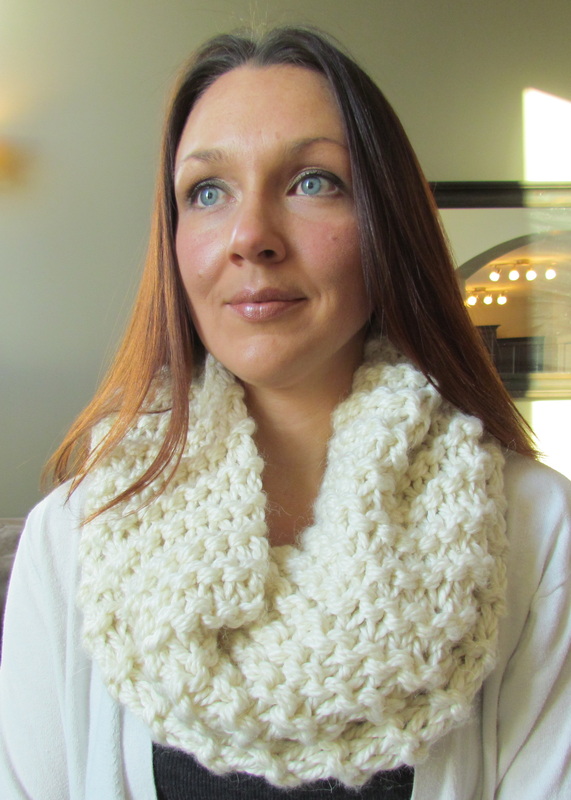
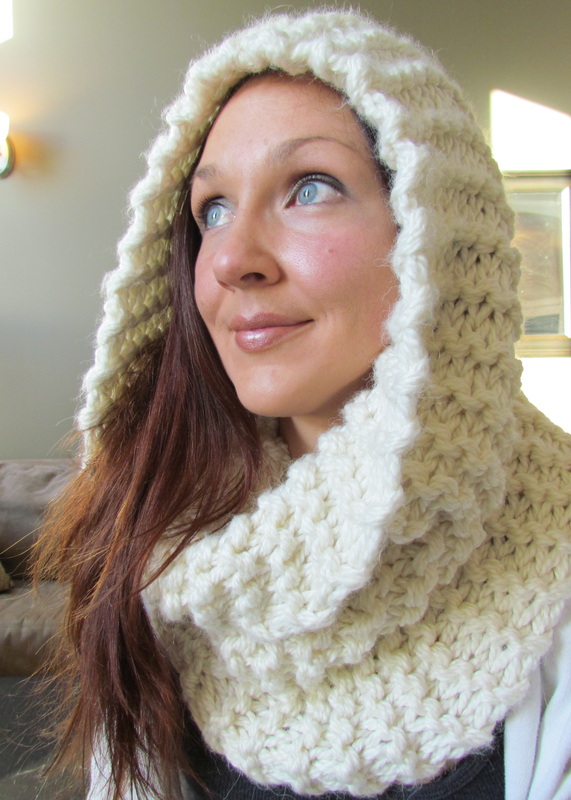
Matching Mom and Newborn Winter Hats... A Challenge.

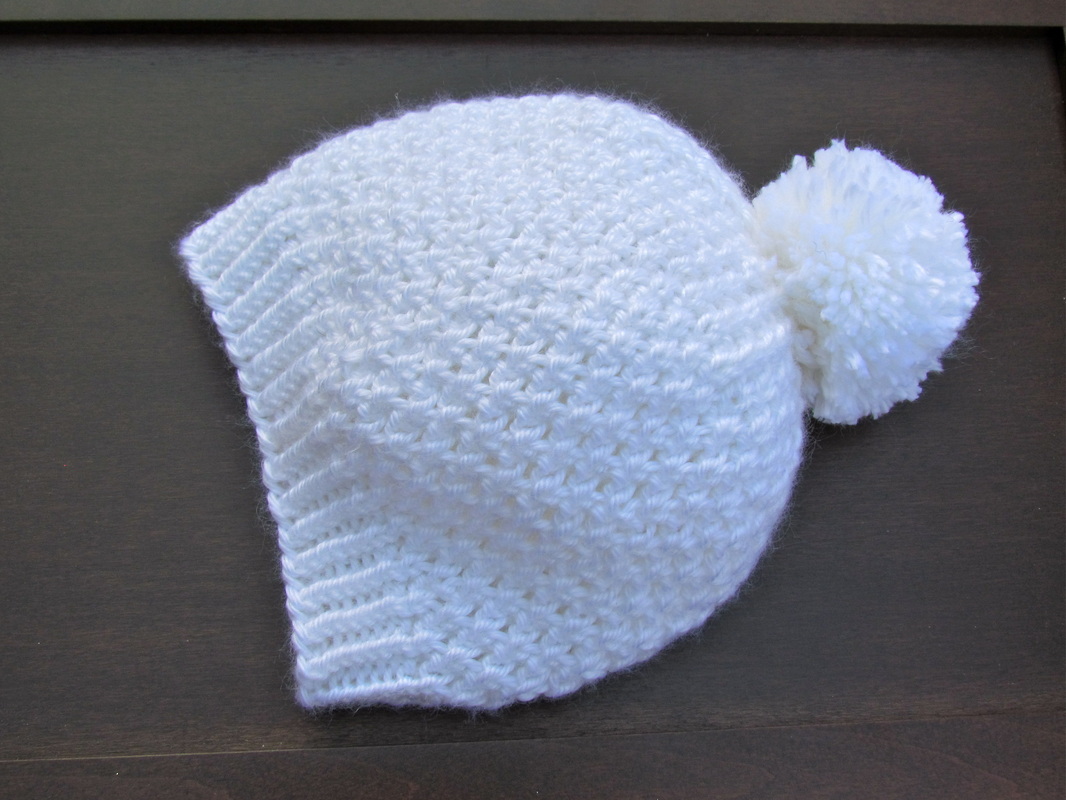
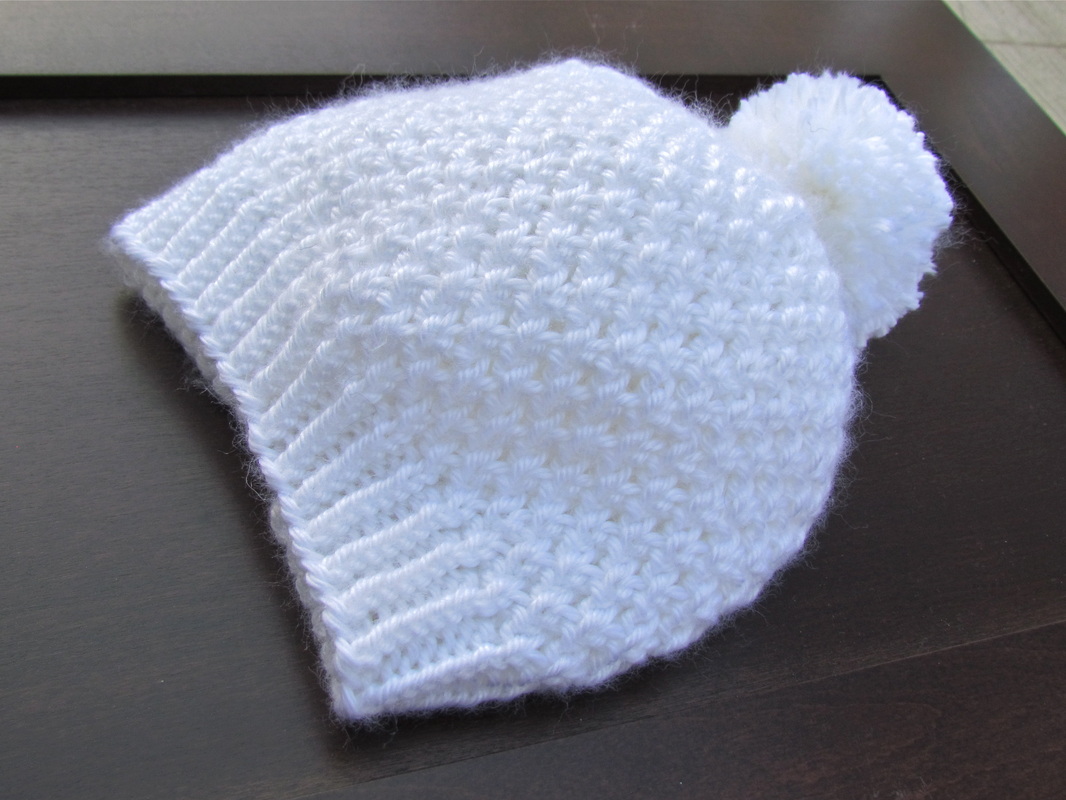
So a friend of mine from work threw out a simple request to me, and it's been more of a challenge than anticipated.  To make matching mommy and newborn baby hats.  It's an adorable idea, however, a unique one , as there are few patterns out there that can be used this way.  So, yet again, I gave up my slog through zillions of newborn patterns, and wrote my own... A pattern that I would want to wear, but that would still be adorable on a newborn.  I liked the idea of a knitted stitch with lots of texture, to add interest without making the hat too busy.  So I discovered the 'alternating dot stitch'.  It's kind-of lacy without adding giant holes to the fabric... Perfect!  So, I knitted up my test hat, and it SHOULD fit a newborn perfectly (but I don't have a newborn to test it on).  It knits up to fit a 12-14" circumference head, and has enough length to have the brim flipped up (so it can be worn for a little longer as baby grows).  So... here is the pattern kids! Now to make the Mommy version!!!
Picture
Picture
For Newborn Hat: 
Using US size 6 circular needles and Caron simply soft yarn (or any worsted weight yarn) cast on 64.  Join in the round, do not twist. Knit in 1x1 twisted rib for 10 rounds (brim should be about 1inch wide). Change needles to size 8.  Start alternating dot stitch…
Row 1: knit 
Row 2: k1, p1 around 
Row 3: knit 
Row 4: p1, k1 around 
*** Do 7 sets of these first 4 rows.  Should measure approx. 5" when completed. ***

To start decrease rounds: 
Row 1: k6, k2tog around 
Row 2: k1, p1 around 
Row 3: k5, k2tog around 
Row 4: p1, k1 around 
Row 5: k4, k2tog around 
Row 6: k1, p1 around 
Row 7: k3, k2tog around 
Row 8: p1, k1 around 
Row 9: k2, k2tog around 
Row 10: k1, p1 around 
Row 11: k1, k2tog around

Cut a long tail and draw yarn through remaining stitches, bring to inside of hat and weave in tail.
Then as Stephen West would say, "Pom pom it!".  
Mommy pattern still in progress....
0 Comments

Escaping Winter

2/17/2015

0 Comments


The Key to THRIVING in a Zone 2 Climate...

Sorry to everyone who follows my humble little blog for the lack of posts lately.  The winter blues had settled in, and it was time to escape for a sunny little get-away.  Living in Northern Canada has its perks, but the very long winter we endure is not one of them!  So, our family's key to really thriving through these long winter months, is a little sunshine.  I am so very fortunate to be able to do this every year, as I know many are not so lucky.  SO, I am back, revitalized, and ready to prep for spring!
Picture
Picture
Picture
Picture
Picture
0 Comments

Simple Snood

1/12/2015

0 Comments


A Snood... plus making your own bulky weight yarn!

I made this with an Alpaca/Wool blend that I picked up at the craft store... It was a super quick project, and it doesn't require a pattern.  Just go with the flow I say!  For this one, I cast on a solid 28 - 32 stitches on my 19mm straight needles (MASSIVE NEEDLES), using 2 strands of chunky weight yarn held together. I just knit back and forth in garter stitch until I ran close to being out of yarn, then bound off and seamed together (without a twist of course.  A twist would make it an infinity cowl, not a snood!!).  It's fun to just forget the pattern sometimes, and just knit.  If you want to make a bulky weight project (like this one) but only have worsted weight yarn, just hold multiple strands of yarn together! Bulky weight yarn tends to be pretty expensive. Worsted weight yarn is not only cheaper, but there are often discounts for buying multiple balls of the same kind, and you get way more yardage per ball! 
Picture
Picture
0 Comments

Local Yarn

1/11/2015

0 Comments


The Alberta-Tillamook Cabled Hat

I know I write a lot about sourcing local products... but here I go again anyway!  I found a wonderful little mill located in Carstairs, Alberta, who spins and dyes local fibres into beautiful yarn, at a really great price!  I bought 3 skeins of different kinds of yarn from them, and finally completed my first project made with their yarn!  This one is the Prairie Wool Lopi Softspun, and it comes in 33 beautiful colours.  This one is called Jade Heather, and is a stunning turquoise with flecks of pink and purple. It's 100% Dorset sheep wool, and it's not the slightest bit itchy and very warm (but will bother someone with sheep-wool sensitive skin).  I encourage all of my friends to check out their website, customwoolenmills.com, and browse all of their lovely yarns.  I'm very happy with how this hat knitted up (natural wool is the BEST for cabled knitting).  The pattern is free on Ravelry, and is called the Tillamook Cabled Hat.  I made it a bit slouchier than the pattern called for, so you can wear it with the ribbed brim folded up or left as is for a slouchier look. 
Picture
Picture
0 Comments

Gluten Free Maple Banana Bread

1/4/2015

0 Comments


Gluten Free, Dairy Free Maple Banana Bread

I love home-baked banana bread.  It's so warm and comforting when its -30 outside. Unfortunately my go-to banana bread recipe is loaded with refined sugar and white flour.  So this month I'm on a mission to explore other options for my baking.  The whole gluten-free trend is interesting to me... it's logical to try and reduce the amount of fluffy white carbs in your life, isn't it?  So I found some gluten free flour blend at the grocery store, and decided to make their box recipe a little better... better tasting and a little healthier.  This is by no means health food, but it's heads above my standard banana bread recipe.  And for all of my celiac friends out there... This one's a MUST try!  Here it is:
Picture
Gluten Free, Dairy Free, Maple Banana Bread

Ingredients:
1/2 cup coconut oil
3/4 cup maple syrup
2 tbsp maple sugar 
2 free range organic eggs
1 tsp vanilla
11/2cups mashed overripe bananas (4 medium ones)
11/2 cups all purpose gluten free flour blend (I used presidents choice)
1tsp baking soda
1tsp cinnamon
1/2 tsp salt


Preheat oven to 350
With a hand-mixer, whip coconut oil.  then add maple syrup and maple sugar.  Mix on medium speed.  It will be a bit lumpy.  Add your 2 eggs and mix on high until well blended.  If your eggs and maple syrup were cold, it will still be a bit lumpy.  Lastly blend in your vanilla and the mashed bananas.  Mix until smooth(ish).


In another bowl, combine your gluten free flour blend, baking soda, cinnamon, and salt.


Add your flour mixture to your banana mixture and mix gently just until combined.  Pour into a greased (I used coconut oil spray) loaf pan.  Bake at 350 for 55 to 60 mins.  Allow to cool 10 min before slicing.  
Picture
Picture
0 Comments

Snow Dyed Fabric

12/31/2014

1 Comment


Simplified Snow Dyeing (NO soda ash required)!

I love dying fabrics.  It's fun, creative, and a cool project for Lauren and I to do together.  I stumbled across the concept of snow dying the other day, but it involved the use of soda ash for prepping fabric, and professional dyes.  Not my thing.  So i decided to try and do the project with something simpler, and it worked out wonderfully!  So I thought I would share this beginner's version of snow dyed fabric so everyone can do some crafts with all that white stuff we have out there!
Picture
Snow Dying Tutorial
Supplies:  
1. Washed and dried white or natural fabric.  I LOVE working with un-dyed organic bamboo french terry fabric.  There's a wonderful Canadian supplier called Kindrel that I get all these lovely fabrics from.  It's only about $11 (US) a yard for the heavy stuff, and it's worth every penny!  I've also dyed cotton (up-cycling old t-shirts) and it works just as well.  
2. One-step tie dye kit. Any craft store has these kits, and they're pretty affordable if you catch them on sale.  Don't get the professional dyes, because those require the soda ash pre-treatment.
3. A plastic bucket that has a lid.
4. Mesh or metal rack to keep the fabric out of the melted sow puddle.  I used a rack from the warming drawer in my stove, and a cookie cooling rack.  I have also seen people use window screens, etc. It doesn't seem to matter much.
5. Snow


Place your rack in the plastic bucket.  Scrunch up your fabric and place it on top of the rack.  Make sure no ends are falling through or are hanging off the edges.  
Picture
Picture
Picture
Picture
Carefully pile snow on top of your fabric.  Try to cover the edges if you can, not a big deal if some of the fabric is sticking out.  I tried to minimize the amount of snow at the bottom of the bucket though. You don't want the melted water level to reach your fabric.  

Now for the dye, I tried 2 different methods and both worked.  The first method I used was to mix the dyes with half as much water as called for in the instructions (I didn't want the dye to dilute too much once poured on the snow).  Lauren squirted the dye onto the snow in blobs of colour.  I'm sure you can get very creative with this step.  
The other method we tried was to just directly sprinkle the dye powder onto the snow. This method gave a result that had more concentrated sections of colour, with some very dark and very light spots.  The liquid method had a more uniform colour blending.  
Have fun covering the snow with colours!  I found that using 2 colours gave plenty of variation in the end result.  
Picture
Picture
Now the hard part... waiting.  you have to let the snow completely melt, and then let the dye set into the fabric.  SO cover your masterpiece with a lid to prevent it from drying out and leave it overnight.  In the morning rinse your fabric repeatedly until the water runs clear.  I like to hand wash the fabric in the kitchen sink at this point (it helps prevent the dye from bleeding).  Then wring it out and dry it, either on a line or in the dryer.  That's it.  
Have fun!
Picture
Picture
Picture
Picture
1 Comment

Christmas Concert Dress-up

12/5/2014

0 Comments


Can't find it... Then make it!

There is apparently a dress code for Lauren's Christmas Concert this year, and it's a doozy! The kids have to wear ALL WHITE!  White tops, white pants or leggings, and a white skirt for the girls. I don't buy Lauren all-white clothes for obvious reasons, and kids clothing stores have the same basic understanding.  I don't know where people are going to find all-white boys pants... I didn't even bother hunting through stores to find something... I decided this was something that needed to be sewn. With fabric I already have (because I'm not hunting for white fabric either!).  I believe this is what you call 'up-cycling'.
Picture
Picture
Picture
The shirt is a peasant-style shirt made from 3 of my husbands old white t-shirts that he was throwing away.  The beauty of recycling clothes is that you can cut around stained areas, or holes, or whatever.  I used as many of the existing seams as possible too.  Cutting down on both sewing time, and improving the end-product.  It needed a little something to make it 'fancy', so I made a fabric flower and attached it using a plain white button.  Super easy and Lauren LOVED how it turned out.  
Picture
I made the leggings from a thick, beautiful organic bamboo french terry fabric that I bought awhile back (it makes the most beautiful tie-dyed pants and skirts).  I drafted the pattern myself, but learning to draft patterns is pretty easy.  The tutorials on the blog Make it, Love it are the BEST, and I highly recommend using them to help you draft leggings.  
Now to make a skirt....
Picture
0 Comments

Knits to Snuggle With

11/28/2014

0 Comments


A Shawl and a Scarf... Versatility Baby!

I joined a yarn club for my fave alpaca yarn, and it's been keeping me busy.  Last month I received a stunning turquoise blue and purple hand-dyed skein, and it needed to be made into something extra beautiful.  
Picture
Picture
Picture
Picture
I used a free pattern off of Ravelry called the 'Simple Luxury Scarf', and just adjusted my needle size to the weight of my yarn.  The shawl turned out gorgeous, and the pattern really allowed the colours of the yarn to shine.  
Picture
0 Comments

Late Season Canning

11/27/2014

0 Comments


Grandma Sent 5 MORE Bags of Apples...

Picture
Picture
Picture
This fall I posted a quick recipe for applesauce, because my grandma supplied me with a few bags of beautiful organic apples.  Well my Dad came for another visit in mid-November, and he brought five more bags of apples with him!  Apples keep fairly well if you have the right place to store them... Unfortunately I do NOT!  I have no root cellar, my garage is way below the freezing mark, and both of my fridges are filled to the brim.   This month I was also busy with work, training courses on my days off, and planning my daughter's birthday.  SO, what is one to do with a glut of apples, if not applesauce (and no time to speak of)?  Apple Juice!  Pure, sweet, lovely, apple juice.  Warmed with a cinnamon stick, or cold over ice with a bit of Perrier.  This stuff is AMAZING!!!!
Picture
Making your own apple juice is a bit more involved than you might imagine.  Washing and coring the apples is a lot of work on its own... Then you have to run them through a juicer, and then double or triple strain the juice to remove the pulp that floats around on the top (this is a painfully tedious process, but worth the work, for the clarity of the juice).  After that you have to boil your juice, ladle it into hot sterilized jars, and put in a water bath canner for 25 mins or so.  It took me about 5 hours all said and done (about half the time it would take me to do applesauce).  The taste is incredible, and NOTHING like store-bought apple juice! 
0 Comments

Versatility Knitting

11/18/2014

1 Comment


The Hooded Cowl

I am still looking for multi-purpose knits to create, and what better than to take something as cozy as a cowl, and add a hood?!? I'm just imagining those winter days where the wind and snow seems to just appear out of the blue, leaving you wishing you had a hat laying around.  I'm using the Failynn Fox Cowl Pattern as a very rough guideline for this hooded wonder.  That's the great thing about great patterns though... they can be adapted to make a million different things.  I used two strands of golden Homespun yarn, and my now well-used 15mm circular needles, to whip this up in just one day.  I'm smitten.  Hope you are too.  
Picture
Picture
Picture
Picture
1 Comment
<<Previous
Forward>>
    Picture

    About Me

    My name is Robynn, and I am a wife, and mother, living in Grande Prairie, Alberta, Canada.  I am a Registered Respiratory Therapist (RRT), a vegetarian, and an artistic, crafty individual.  I am passionate about the old-world things my Grandmother taught me... Gardening, canning, sewing, and cooking.  I believe they all have an important, and under-appreciated, role in the modern world.  Thank you for taking the time to learn a little more about me.  Enjoy!

    Archives

    January 2015
    December 2014
    November 2014
    October 2014
    September 2014

    Categories

    All
    Baking
    Canning
    Crafts
    Gardening
    Knitting
    Merchandise
    Sewing

    RSS Feed


Powered by Create your own unique website with customizable templates.